How to Change DNS Nameservers in Namecheap
If your domain is registered with Namecheap and you need to point it to another hosting provider, you’ll need to update your DNS nameservers. Don’t worry, it’s simple. Follow these steps to get it done quickly and correctly.
Why Change DNS Nameservers?
Changing your nameservers tells the internet where your website lives. It’s essential when:
- Switching hosting providers – Your new host uses its own DNS system.
- Improving performance – Some DNS services are faster or more reliable.
- Enhancing security – Specialized DNS providers can protect against attacks.
In short, your nameservers control where your website and emails are directed. Setting them up correctly ensures your site loads properly for visitors.
Step 1 – Log In to Your Namecheap Account
Head over to Namecheap.com and sign in. You’ll land on your Dashboard, which lists your active domains.
Step 2 – Access the Domain List
From the left-hand menu, click Domain List. This page displays all your domains under management.

Step 3 – Select the Domain
Find the domain you want to update and click Manage to open the domain details page.
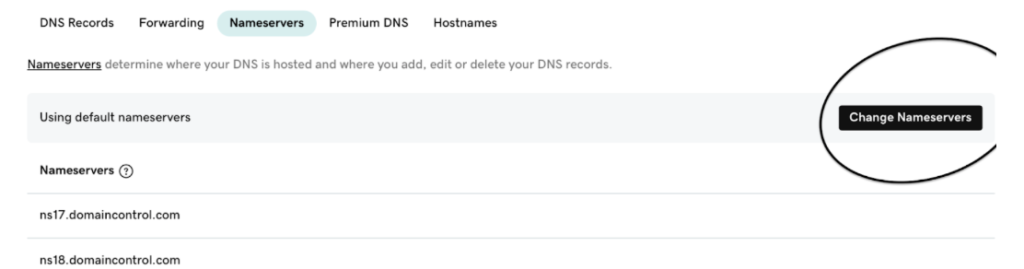
Step 4 – Navigate to the Nameservers Section
Scroll until you find the Nameservers or DNS Management section.
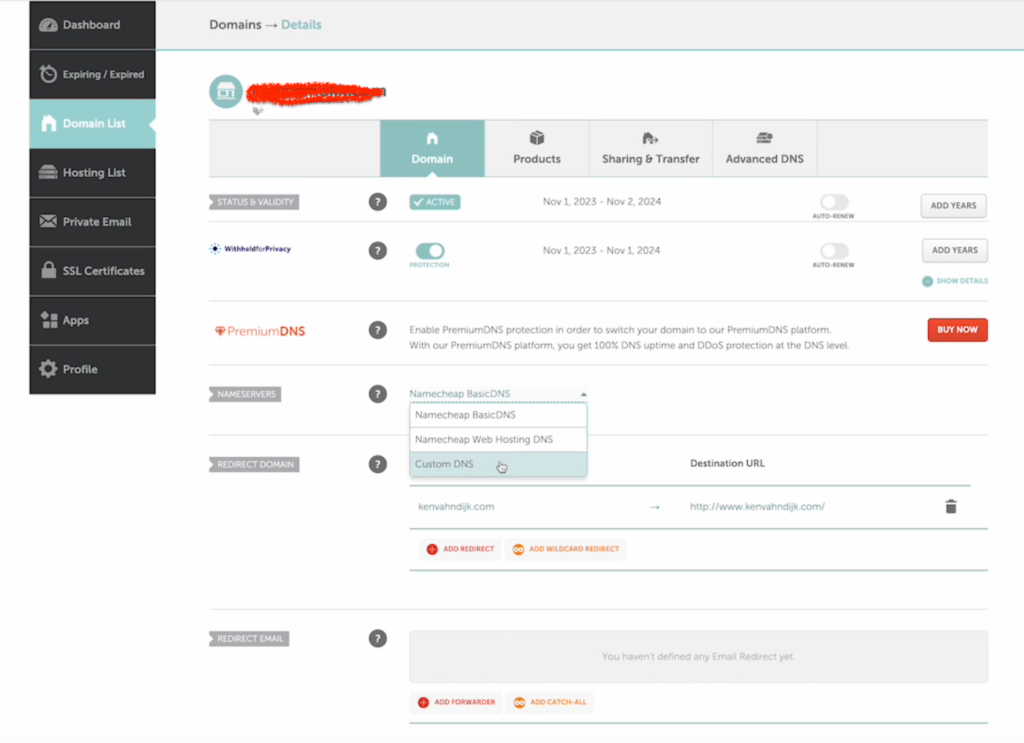
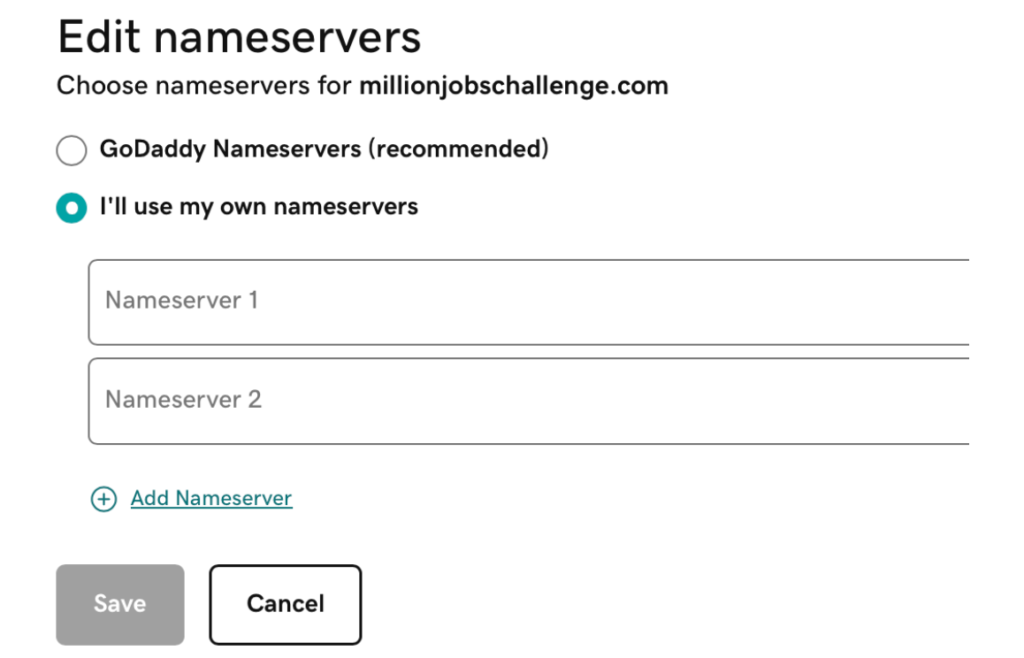
Step 5 – Choose Custom DNS
From the dropdown, select Custom DNS (sometimes labeled Use Custom Nameservers). This allows you to manually enter your hosting provider’s DNS details.
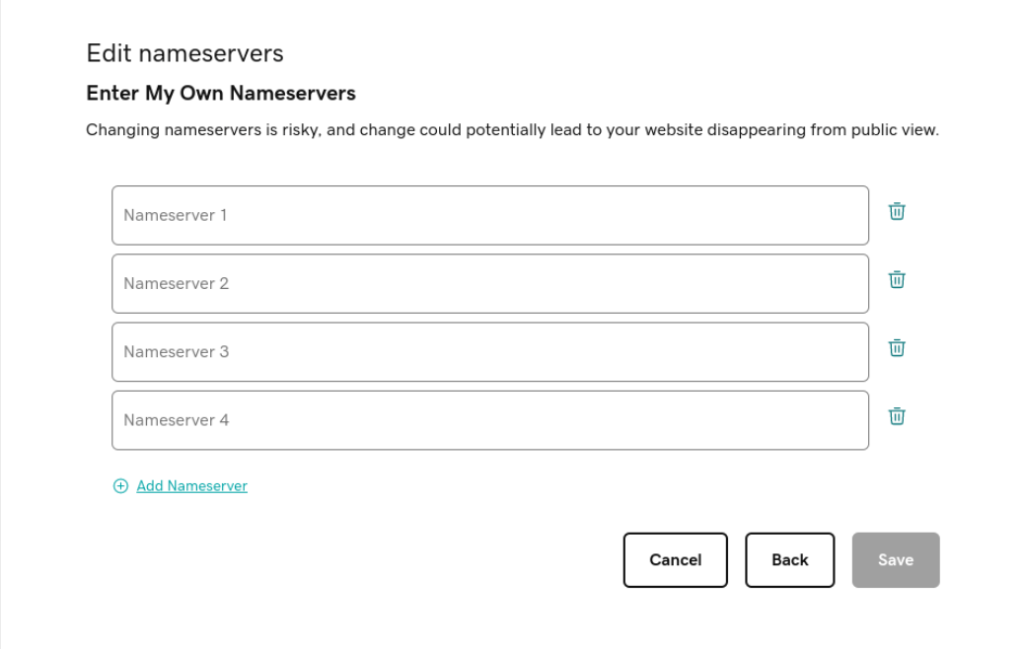
Step 6 – Enter New Nameservers
Enter the new nameservers provided by your host. You’ll typically have at least two:
Nameserver 1: ns1.yourhostingprovider.com
Nameserver 2: ns2.yourhostingprovider.com
Double-check them; typos here can take your website offline.
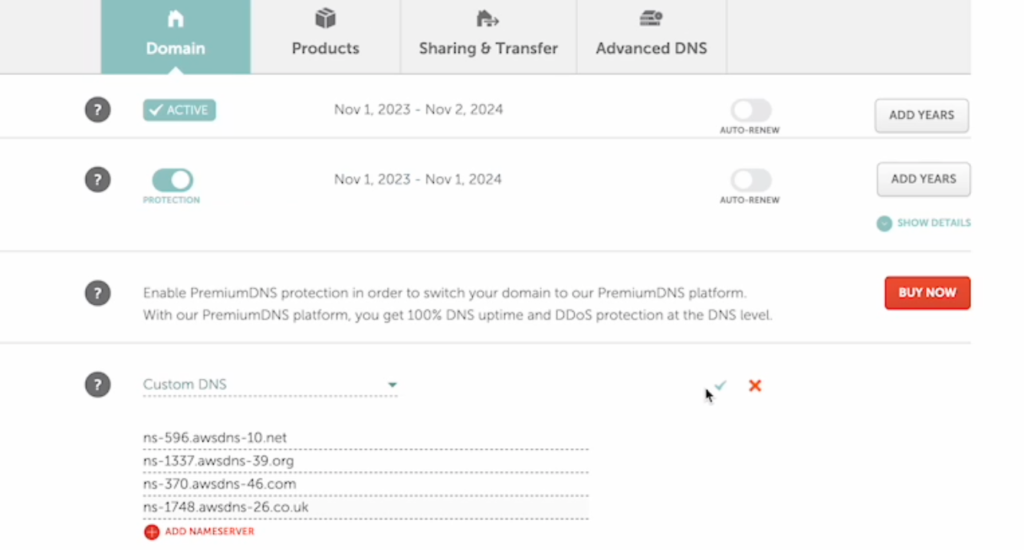
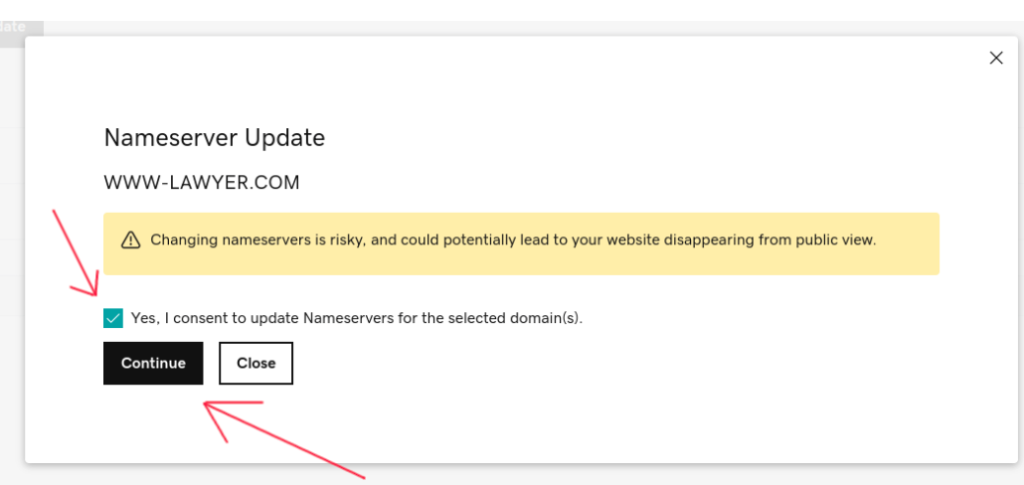
Step 7 – Save Changes
Click the green checkmark (✓) or Save button to confirm your updates.
Once saved, DNS propagation can take anywhere from a few minutes to 24 hours. During this time, some visitors may still see your old hosting server.
Conclusion
Changing your DNS nameservers in Namecheap is straightforward once you know where to look. Just be sure to enter the correct details and give the changes time to propagate.
If you also manage domains through GoDaddy, check out our companion guide: How to Change DNS Nameservers in GoDaddy.